Before we get into the details…I’m aware this is probably overkill for a lot of what I do, and almost certainly overkill for the average video conference participant.
But this is what I do for a living. I show up to my clients on video now, so I want to make sure I show up well.
I also use this same setup to record video for our online courses. Video and audio quality matters even more for recorded video, and it’s easy enough to use the same setup for both.
This isn’t a recommendation for anyone else—I’m sharing this simply because people ask all the time about my setup.
Video
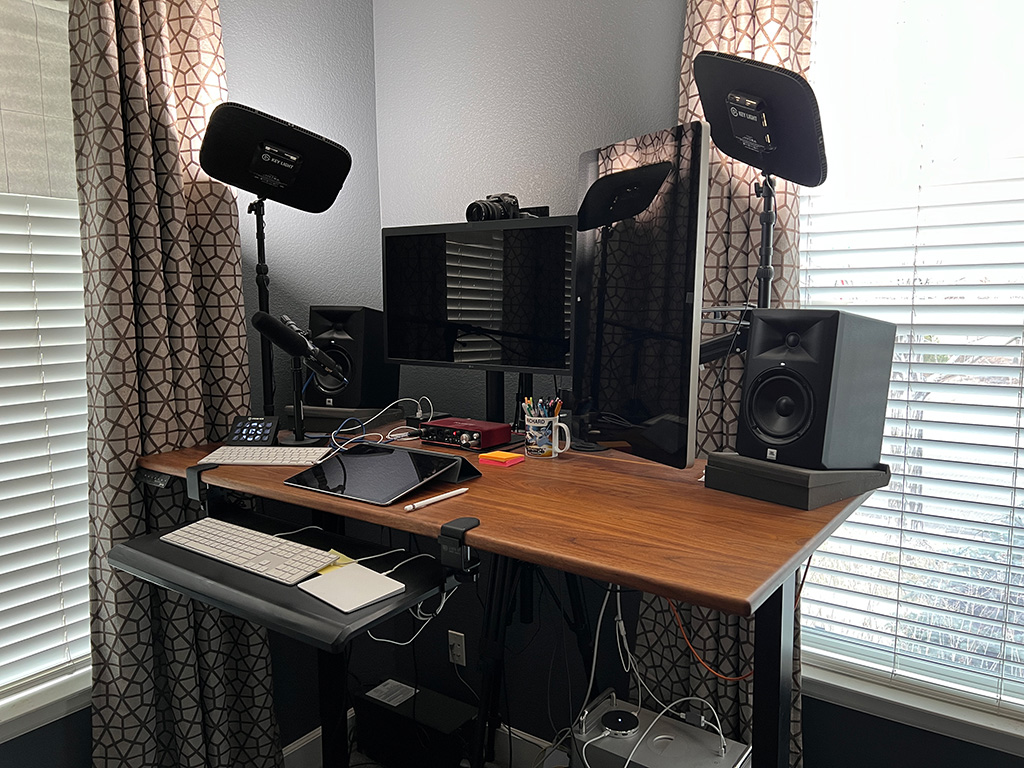
I use a Panasonic GH5 mirrorless camera with a Panasonic 12-35mm f/2.8 lens. The HDMI live view from the camera goes into a Blackmagic DeckLink Mini Recorder 4K card on my Mac Pro. The video feed from the Blackmagic card is a video capture source in OBS.
Audio
I have a an audio-technica AE6100 vocal mic on a small boom stand on my desk. It’s off-camera, about a foot from my mouth. This probably isn’t the perfect mic for this application, but I had it around, and it’s good enough.
Audio monitoring is from a pair of JBL LSR305 studio monitors on my desk.
Headphones would be better for audio quality, but I find them uncomfortable to wear all day and don’t like them being visible on camera.
For those rare situations where audio quality matters most (e.g. when I’m a guest on an audio-only podcast), I’ll wear the custom 64audio in-ear monitors I use when I’m playing music on stage.
Audio gets in and out of the Mac via a Focusrite Scarlett 2i4 USB audio interface.
My mic is an audio capture source in OBS. I also capture audio from Rogue Amoeba’s Loopback (for e.g. Spotify audio) and Farrago (for sound effects and music clips).
iPad as a Video Source
When I’m teaching, I often draw on my iPad to illustrate a concept. For that, I draw in the Procreate app on my iPad Pro. It’s connected to my computer over USB and captured as a video source in OBS.
OBS to Zoom/Teams/etc.
I use the NDI Output plugin for OBS to make the OBS main video an NDI source and the NDI Virtual Input app to make that source show up in video conferencing apps as a webcam and mic.
NDI Virtual Input has a couple of issues:
- It only outputs up to 720p (even if OBS sends 1080p on its NDI stream). 720p is fine for video conferencing, but when I’m recording a Humanizing Work Show episode in Riverside, for example, my video is lower quality than I’d like it to be.
- Every so often, my video will freeze in Skype or Teams or go black in Zoom, and I have to restart NDI Virtual Input to get it working again. Many days, this never happens. Some days, it happens multiple times per hour.
Lighting
Lighting is at least as big a contributor to video quality as the camera. I’m fortunate to have nice natural lighting in my office from two sides of the room. That’s my primary light source during the day. But, especially in winter, that light changes throughout the day and isn’t enough early and late in a full-day workshop. So, I have a pair of Elgato Key Light LED panels. I bounce one off the blinds on the window behind and to the right of my camera that’s my primary daylight light source. I bounce the other off the corner to the left where my daylight fill light comes from. I set them to a daylight light temperature. This keeps my lighting on video reasonably consistent throughout the day.
I also have a Philips Hue bulb off-camera behind me to do a slight color wash on my back wall, which increases the sense of depth in my video, especially at night.
Stream Deck
Finally, I use an Elgato Stream Deck for quick access to OBS scenes, sound effects, Zoom muting, lighting, etc.
Got more questions about my setup? Reach out on Twitter.
Last updated